Made-to-order B2B production. Specifications are confirmed through sampling.
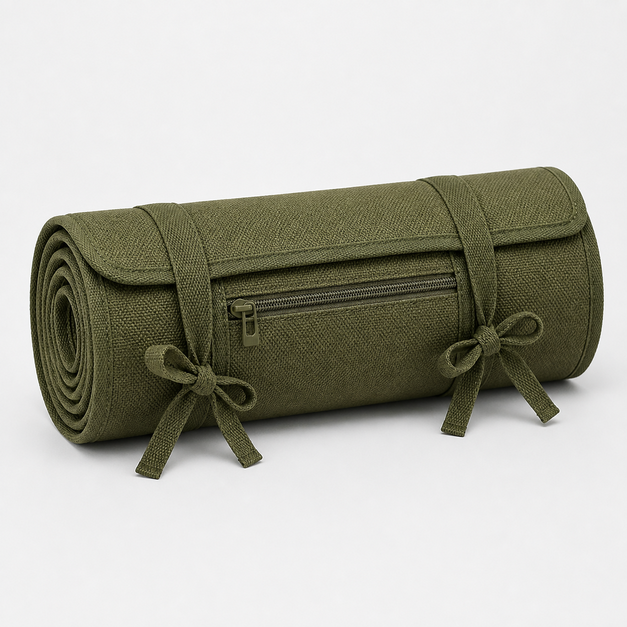
A made-to-order roll-up tool organizer concept for field-service, maintenance-kit and OEM component programs. The olive-green horizontal panel combines a full-width top cover flap, six graduated slots, one exterior zipper pocket and two closure ties; the final pocket map and rolled proportion are confirmed through sampling.
Look closer at the construction
Use the open and detail views to define the pocket sequence, cover flap and rolled closure.
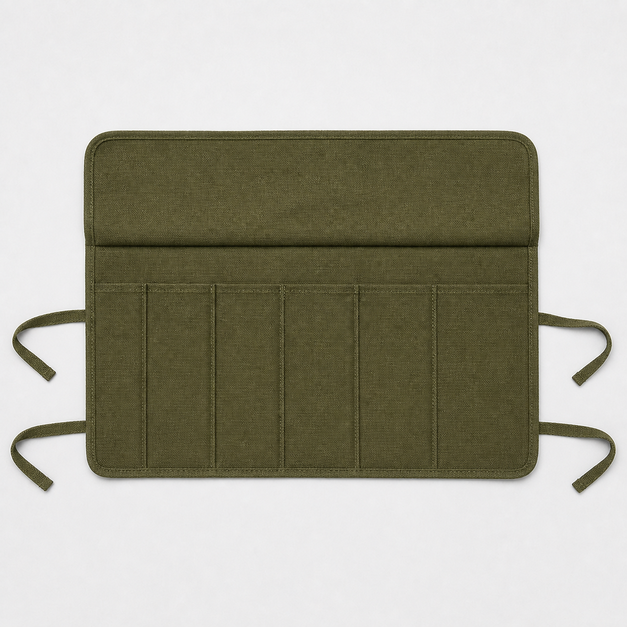
Six-slot open layout
The horizontal panel shows six empty slots in graduated widths beneath one full-width cover flap. Confirm the slot sequence and opening depth around the buyer's component list during sampling.
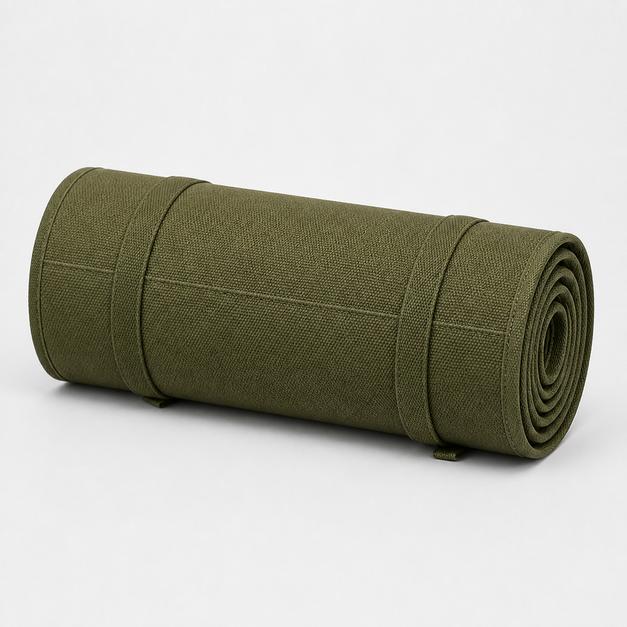
Roll-up horizontal panel
Full-width top cover flap
Six graduated-width tool slots
One exterior zipper pocket and two closure ties
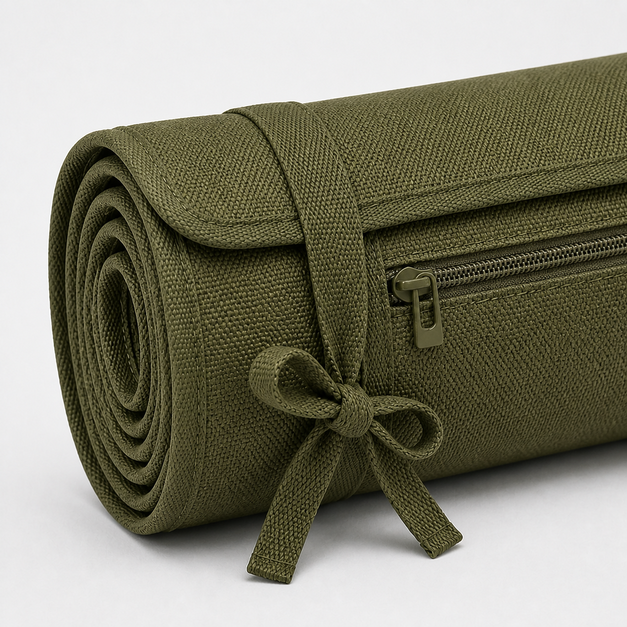
Pocket, binding and closure tie
Review the slot divisions in the open view, then use the detail view to discuss edge binding, the exterior zipper pocket and tie attachment as one construction system. The pictured details are editorial directions, not evidence of load, wear or material performance.
Olive-green woven textile direction
Coordinating textile flap and closure-tie direction
Reference visuals, not production approval. Features, construction and any performance requirement must be confirmed on your sample.
MATERIAL BUILD
Roll-up tool organizer materials
The listed materials define an editorial direction for Field Roll Tool Organizer. Confirm composition, weight, finish and compatibility with the slot map as part of the approved project specification.
Outer panel material
Reference directionOlive-green woven textile direction
Review the selected shell across the open panel, rolled exterior and zipper-pocket area. Color and surface are approved against the physical sample.
Flap & slot finish
Reference directionCoordinating textile direction
Specify the cover flap, slot layers, edge finish and stitch layout together. The buyer's component list determines the final pocket sequence.
Closures & trims
Reference directionTo be defined with your sample
Confirm zipper, puller, two tie closures and attachment points as part of the complete rolled and open sample.
The close-up belongs to this editorial design reference. It does not verify fiber composition, coating, certification, load, wear resistance or production capability.
Tell us what should stay, what should change and which details matter most to your program. These options are development decisions, not a fixed configuration.
Customization options
Panel and rolled proportions
Slot widths and sequence
Flap, pocket and tie construction
Branding placement
Panel & slot map
Share the intended component list and arrangement. Confirm panel proportion, six slot widths, opening depth and sequence on the sample.
Flap, pocket & ties
Define cover-flap depth, exterior zipper-pocket position, rolled diameter direction and both tie attachment points.
Brand & packaging
Send artwork, preferred application, placement and packaging brief. Confirm decoration and the agreed rolled presentation on the approved sample.
FUNCTIONAL DETAILS
Tool roll design decisions
Use these checks to translate the Field reference into a buyer-specific development brief.
01
Slot sequence
Set each graduated width from the actual component list rather than applying a generic sequence. Review access with the cover flap raised.
Buyer questionWhich component determines each slot width and depth?
02
Rolled proportion
Review how the empty and filled panel rolls around the pocket stack, then confirm the tie length and attachment positions on the sample.
Buyer questionWhat rolled profile should the approved sample achieve?
03
Exterior pocket
Define the zipper-pocket contents and opening direction so the pocket remains intentional in both open and rolled states.
Buyer questionWhich smaller components belong in the exterior pocket?
The pictured construction is an editorial reference. Final fit, materials and performance criteria belong to the agreed sample specification.
YOUR DEVELOPMENT PROCESS
Developing your roll-up tool organizer
A practical sequence for adapting Field Roll Tool Organizer to a B2B kit brief.
01
Define the component map
Your input
Share the intended components, their arrangement and the reason for each slot width.
Review output
An agreed six-slot map and exterior-pocket brief for the first pattern.
02
Choose the material set
Your input
Review the olive-green panel, flap, slot layers, zipper and tie directions.
Review output
Material and construction choices recorded for sampling.
03
Review the first sample
Your input
Check slot access, cover-flap depth, zipper pocket, rolling sequence and tie positions with representative contents.
Review output
Written fit and construction comments with required revisions.
04
Approve the complete version
Your input
Confirm the revised pattern, materials, color, artwork position, pocket map and closure ties.
Review output
An approved sample and specification for the order.
05
Set the bulk checks
Your input
Define measurement, construction and appearance checkpoints; agree separate tests for any performance requirement.
Review output
A check list tied to the approved specification rather than the images.
06
Confirm packing & dispatch
Your input
Specify the rolled packing arrangement, labels, carton plan and dispatch information.
Review output
Agreed packing details and shipment coordination.
SamplingConfirmed after specification review
Bulk productionConfirmed after sample approval and production planning
Timing and any performance requirement remain subject to the agreed specification, material availability, revisions and production plan.
Use representative components to check all six slot widths, opening depth, cover-flap reach and exterior-pocket access.
02
Construction
Review slot stitching, edge finish, zipper pocket, tie attachments and the rolled profile against the agreed brief. Agree separate tests for any performance requirement.
03
Brand details
Check artwork size, position, color, label wording and rolled packing arrangement. Approve the final specification and sample together before bulk production.
Discuss the Field Roll Tool Organizer specification.
The design name is included below. Share the component list, slot sequence, required changes, expected quantity and target timing; attach a brief if available.